Pinhole Passion: Instant Pinhole Camera in Instant Film Pack
5 16A step-by-step tutorial to make your own pinhole camera for Polaroid film!
Lately, I've found myself more and more intrigued by the magic world of pinhole photography. Since World Pinhole Photography Day was just a few days ago, I got ready to celebrate the occasion with a whole arsenal of pinhole cameras I've made myself. Here are my latest creation and a step-by-step tutorial in case you want to make one too: an instant pinhole camera for Polaroids!

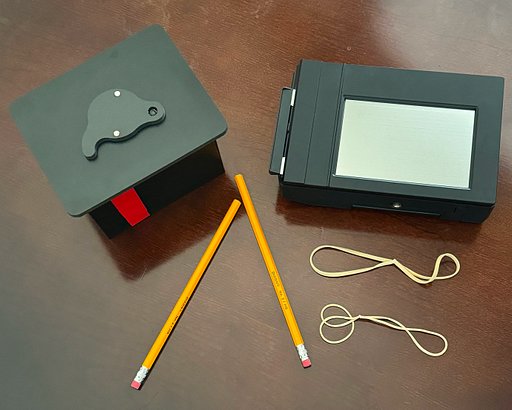
Materials
- A box of Polaroid film (and the film too, of course!). Since original Polaroid film is quite hard to find these days, I used Impossible film, namely PX 70 Color Protection.
- A tiny piece of aluminum (I cut mine out of an empty soda can)
- Black electrical tape, scissors, a pin, and a marker
How to Make the Instant Pinhole Camera with the Film Pack
First, open your film box and take the film cartridge out. If you're using an Impossible film as I did, you will notice that the box it's all covered with silvery plastic inside, even in the corners, making it light-proof except for the part you opened to take the film out. This makes our job easier, as we will only have to cover one side (and its two corners) with black tape, but this will be the very last step.
So, take your empty box and mark its center. Now, cut a little square around that spot.


Take an empty soda can and cut a small piece of tin out of it, roughly as big as the square hole you've just cut out of your box, and pierce a hole through it using a pin. Do not make the hole too big, just enough for a tiny ray of light to pass through it, and try to make sure the edge is as clean as possible. When making my pinhole, I usually put my aluminum piece of a rubber, as it makes it easier to pierce it without shaking the pin. Also, it prevents you from turning your table into a colander.

Next, tape your piece of aluminum right on the hole in your box. Use black tape to make sure light will not leak in from its sides.

Now, it's time to make a shutter for your instant pinhole camera. You have many, many options here, but I think that the easiest one is to cut some black tape, fold it on itself leaving just a tiny sticky part on top of it [that you will glue to the box, a bit above the pinhole] and keep it in place using another piece of (possibly, not too sticky) tape on the bottom.


What now?
You will now have to go to a darkroom (any very dark room will do), take the film off your cartridge and put it into your brand new pinhole camera, tape the open side of the box to make it 100% light-proof, turn on the light and go take pictures. Unlike Fuji Instax Mini film, Polaroid film's light-sensitive side is the front (the side where the picture is), so you will have to put it into your pinhole camera with the front side facing the pinhole.
To take a photo, just lift the shutter so that light can get inside through the pinhole. I usually determine the exposure time with my pinhole cameras following this exposure guide:

I'm not very familiar with this film yet, so I cannot recommend a more detailed exposure time chart. This film is rated as ISO 125, but it seems a bit faster to me, so I would shoot it as ISO 200, but that's just an opinion. I guess the best thing to find out the perfect exposure time is through trial and error.
Remember to keep your pinhole camera as steady as possible while taking a picture, and to make sure the shutter is perfectly closed once you're done exposing the film.
Once the film has been exposed, you have to wait until you get to the darkroom before taking it out of the pinhole camera. Then, in complete darkness, you will have to press the white edges to activate the film development process. I would not roll a pen on the film as when I tried it with Fuji Instax Mini, the results were horrible. Instead, I gently rubbed the white edges for a moment and then put my Polaroid in a book and left it there for a whole hour, as it takes about forty minutes for the picture to fully develop according to the sheet that comes with the film.
Now, let me show you my very first picture with this pinhole camera, taken indoors, 13 minutes exposure. It's very blurry and a bit reddish but I'm super happy with it!:

Potential Problems and Quick Fixes
In the meantime, I'd like to share a few more tips that might be helpful if you're experiencing the same problems that I've had when playing with pinholes and instant film.
First problem: How do I get the film out of the cartridge?
This part is a bit tricky, especially because you'll be doing it in the dark. I can't help you that much on this, you just have to lock yourself in the darkroom and try with your fingers, scissors, screwdriver, whatever. Please remember that Polaroid/Impossible film cartridges have a battery inside, so be careful.
Second problem: What do I do with the other film sheets?
It's up to you. You can keep the other 7 films in a light-tight container (perhaps another film box completely covered with black tape) and feed them to you pinhole camera after you're done with the first picture. This isn't much convenient, as the hardest/most boring part of this project is the one about putting the film inside the camera, in my opinion. This is why I decided to make two more pinhole cameras following this very same process, which enables me to take more than one single Polaroid at a time. I would have made more, but I only had three boxes of Impossible film, so I had to store the four other film sheets in a tight lightbox, but I'll definitely build more as soon as I find some similarly sized boxes.
I think this is it. I have taken more pictures with this pinhole camera on World Pinhole Photography Day (April 28th) and will share the results on my blog. I really hope you enjoyed this tutorial and I would love to hear your advice and stories on DIY pinhole cameras, so feel free to share!
written by bunnyears on 2013-04-30 #gear #tutorials #diy #pinhole #tutorial #tipster #instant-film #polaroid #lomography #pinhole-camera #pinhole-tipster #pinhole-passion


5 Comments